Creating Tables
Step 1
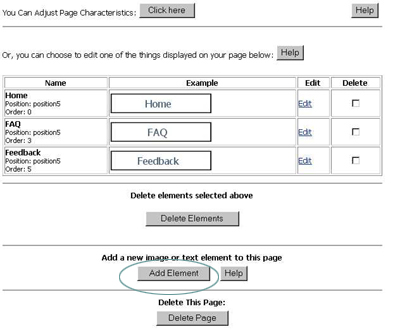
In order to create a Table on one of your website pages Scroll to
the end of the Page Admin screen and select the
"Add Element" Link
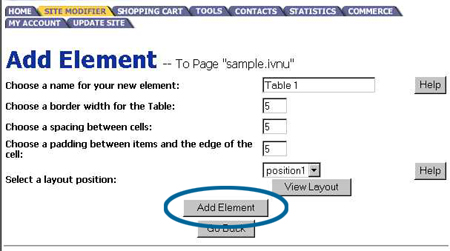
Step 2
On the Add Element screen you will be asked to select an
element type from the pull down menu provided.
Select Table and click continue.

Step 3
The next screen will allow you to determine the exterior characteristics
of your table.
- Border
- Cell Padding
- Cell Spacing
Step 4
Now it is time to determine the interior characteristics of your
table by determining the number of rows & columns your table will
have.
Click on the Update Table Properties Link
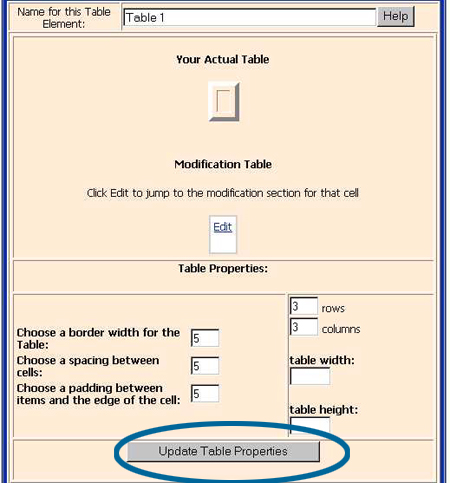
Step 5
The Update Table Properties link will refresh your screen to
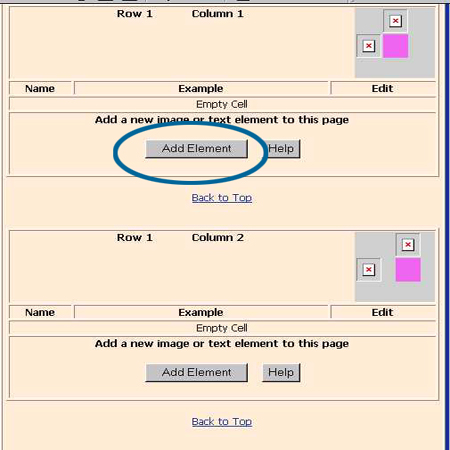
show your table with empty elements for modification.
Click on the first blue edit link to begin customization of row 1 column 1
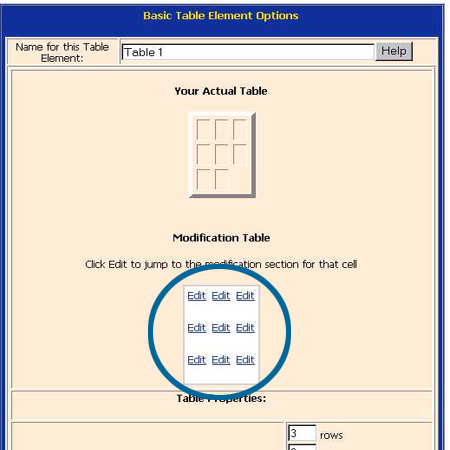
Step 6
This will jump you down to the beginning element administration
section of your table. Click on the "Add Element" button.
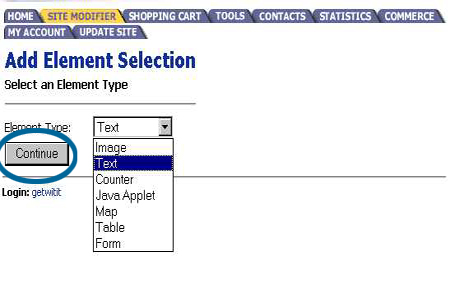
Step 7
This will take you back to a familiar Add Element Screen.
Now you will be working withing the table you've just created. Select
the element type you want to add to row 1 column 1 of your table
& click on continue.
Step 8
Depending on the element type you added follow the procedures found
under Changing Images, Changing Text, or Uploading
Files.
Repeat Steps 5 through 8 until you have completed customization of your table.