Changing Images
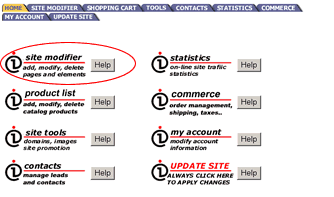
From the advanced administration page select site modifier.
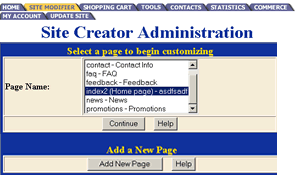
This will take you to a new page called the Site Creator Administration.
You are now in the SITE CREATOR ADMINISTRATION PAGE. The first box will ask you to select a page to modify. Select the page you want to modify. It will turn blue (default setting is for index2 home page.) and click on the Continue button below that box.
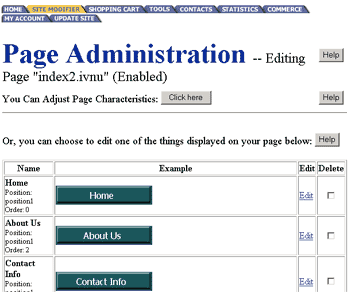
You are now in the PAGE ADMINISTRATION screen. Our tools break the components of that page into individual elements so you can modify each elements individually. Go to the image you want to modify and click on the blue EDIT link. (This is located to the right of image that you want to change.)
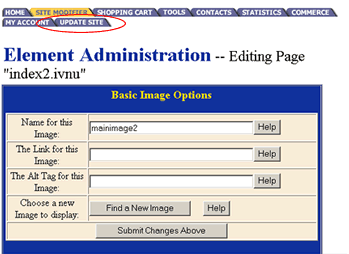
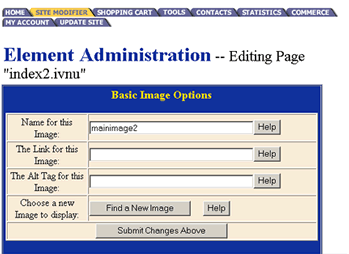
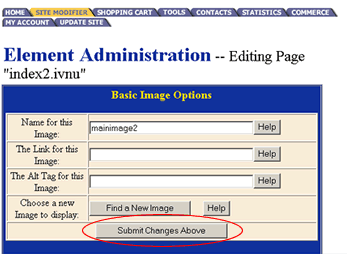
You are now in the ELEMENT ADMINISTRATION screen. In the first blue box listed BASIC IMAGE OPTIONS, we will go to the line marked CHOOSE A NEW IMAGE TO DISPLAY and click on the "FIND A NEW IMAGE" button.
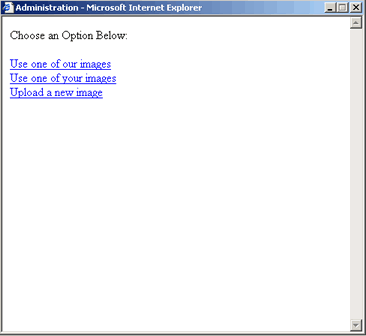
A window will pop up with (3) options:1.) USE ONE OF OUR (Webcenter's) IMAGES, 2.) USE ONE OF YOUR OWN IMAGES, and 3.) UPLOAD A NEW IMAGE. Select the option that allows you to use the image you need.
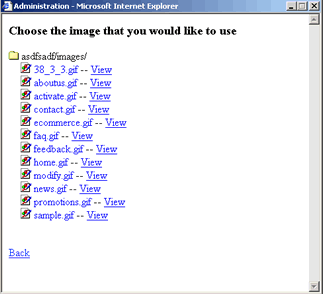
If you selected the option OF USING ONE OF YOUR OWN IMAGES it will display a box with a folder showing your site name and all the images associated with that site. Click on the "View" link to see the image.
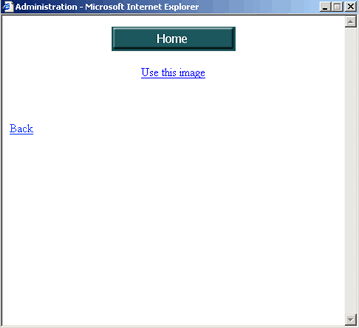
Your window screen will now change to show a picture of the image. If this is the image you want to use then click on "Use this image".(If not, then click on the "BACK" link which takes you back to the previous page.) Your window screen will now display YOUR IMAGE HAS BEEN SELECTED and there will be (2) blue links: CLOSE WINDOW or BACK. Click on the CLOSE WINDOW.
This will bring you back to the ELEMENT ADMINISTRATION page. Under the box marked as BASIC IMAGE OPTIONS click on the button named "SUBMIT CHANGES ABOVE".
You can also create image links & alt tags from your images in this section. Type the url in the "The Link for this image" field for image links. Type the text to be displayed when the user places the mouse cursor over the image in the "The Alt Tag for this image:" field. ( for an example move your mouse over the image).
You will be redirected to the ELEMENT ADMINISTRATION page. Click on "UPDATE SITE" to finalize all your changes.